Introduction
Ringlock scaffolding, known for its innovative rosette design, has become the preferred modular system across industrial and commercial construction projects. From high-rise buildings to complex facade work, its adaptability, strength, and speed of assembly offer major advantages. In this guide, APAC Scaffold explains how to erect Ringlock scaffolding safely and efficiently, whether you’re a seasoned contractor or managing your own build.
What Is Ringlock Scaffolding?
Ringlock scaffolding is a modern modular scaffolding system widely used in construction, industrial maintenance, and infrastructure projects. Known for its versatility, strength, and speed of assembly, Ringlock is designed to provide a safe and efficient working platform at height.
How to Erect Ringlock Scaffolding
Pre-Erection Planning
Before you start building:
Site Inspection: Assess ground conditions for stability, slope, and hazards (drainage, overhead lines, etc.).
Load Requirements: Determine the scaffold’s purpose (e.g., façade access, heavy-duty support) and calculate expected loads.
Scaffold Design Drawing: Follow engineered drawings or supplier layouts tailored to the project.
Permits & Approvals: Ensure local authority permissions and contractor safety documentation are in place.
Component Inspection
Prepare all necessary components, its main components include:
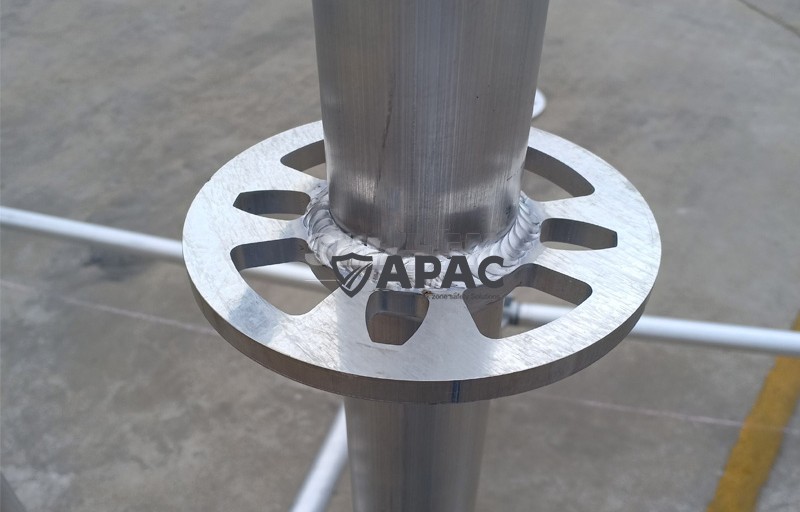
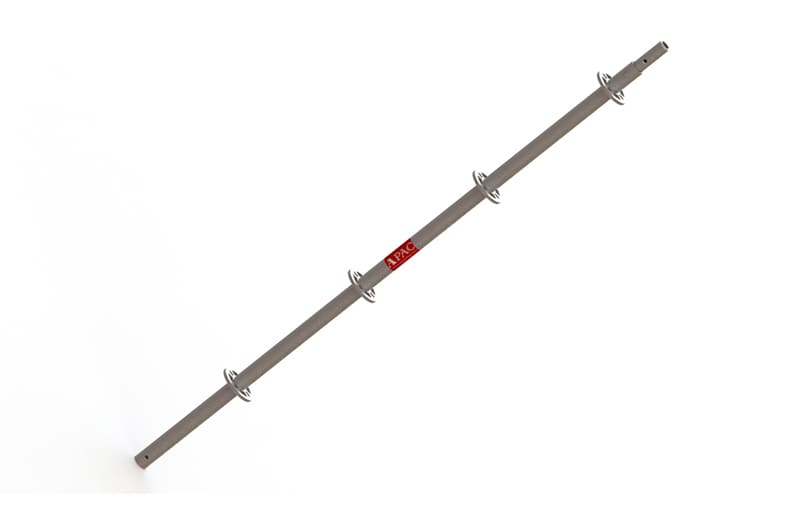
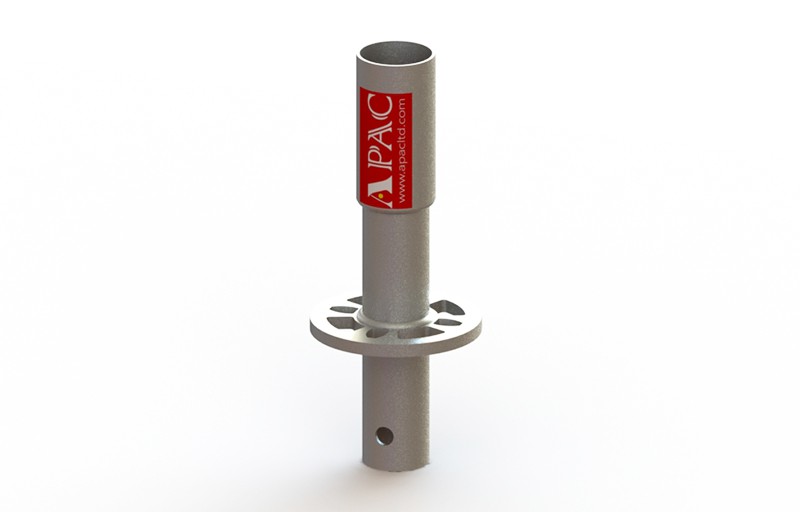
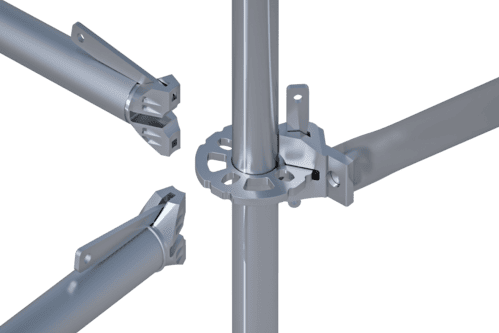
Standards (Vertical Posts) – Upright vertical tubes with rosettes (ring connectors) welded at regular intervals.
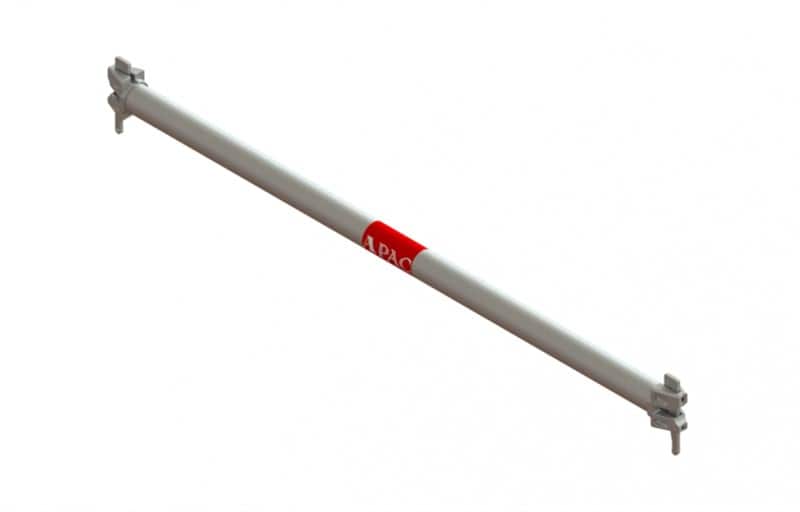
Ledgers (Horizontal Members) – Connect to standards using wedge-heads and secure quickly with a hammer blow.
Rosette Connector – The circular disk welded to standards with 8 holes allows for up to 8 connections at various angles (45°, 90°, etc.).
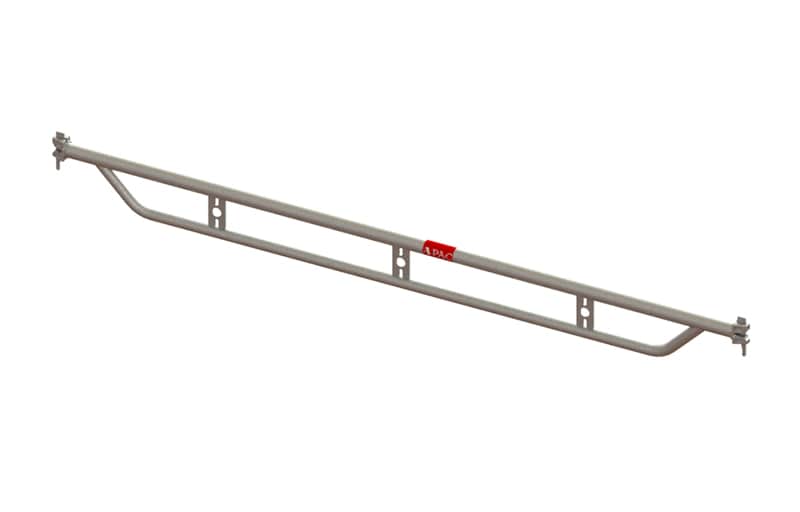
Diagonal Braces – Provide stability and prevent sway by forming rigid triangles.
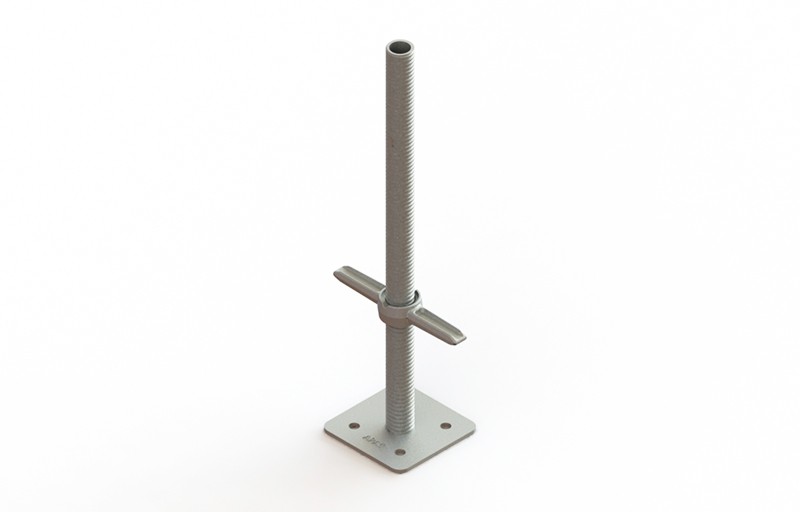
Base Jacks – Adjustable footplates that level the scaffold on uneven ground.
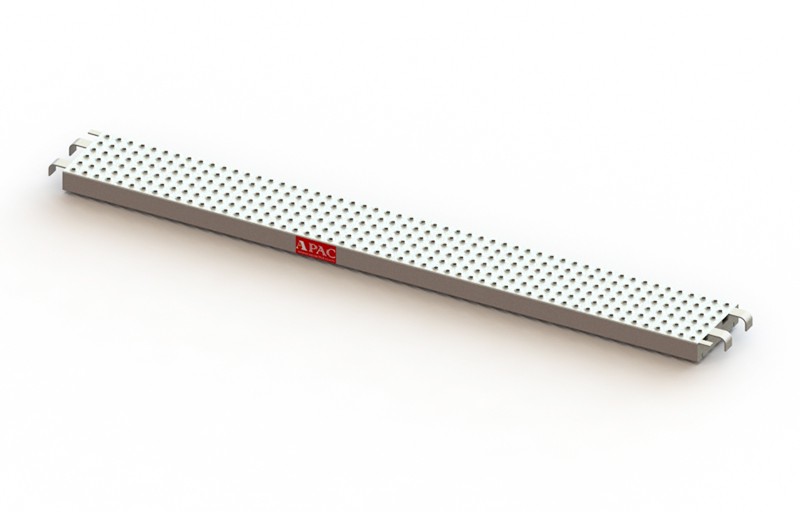
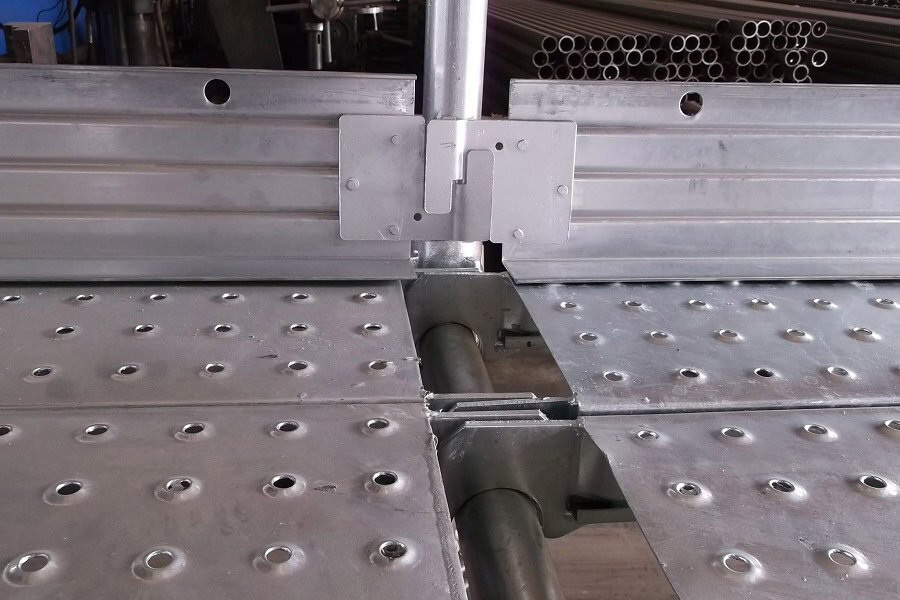
Decks/Planks – Steel or aluminum platforms that workers stand on during construction.
Erection Procedure (Step-by-Step)
Step 1: Lay Out the Grid
Mark scaffold positions based on design layout.
Place sole boards and adjust base jacks for a level foundation.
Step 2: Assemble the First Bay
Insert standards into base jacks.
Connect ledgers to rosettes using the wedge head – strike with a hammer to lock in place.
Use a spirit level to ensure vertical and horizontal alignment.
Step 3: Add Diagonal Braces
Install diagonal braces to stabilize the first level.
This creates a rigid, square base that prevents sway or collapse.
Step 4: Build Upwards
Add vertical standards for the next level.
Repeat ledger and diagonal bracing at each lift (typically 2m intervals).
Install platforms/planks at each working level before advancing higher.
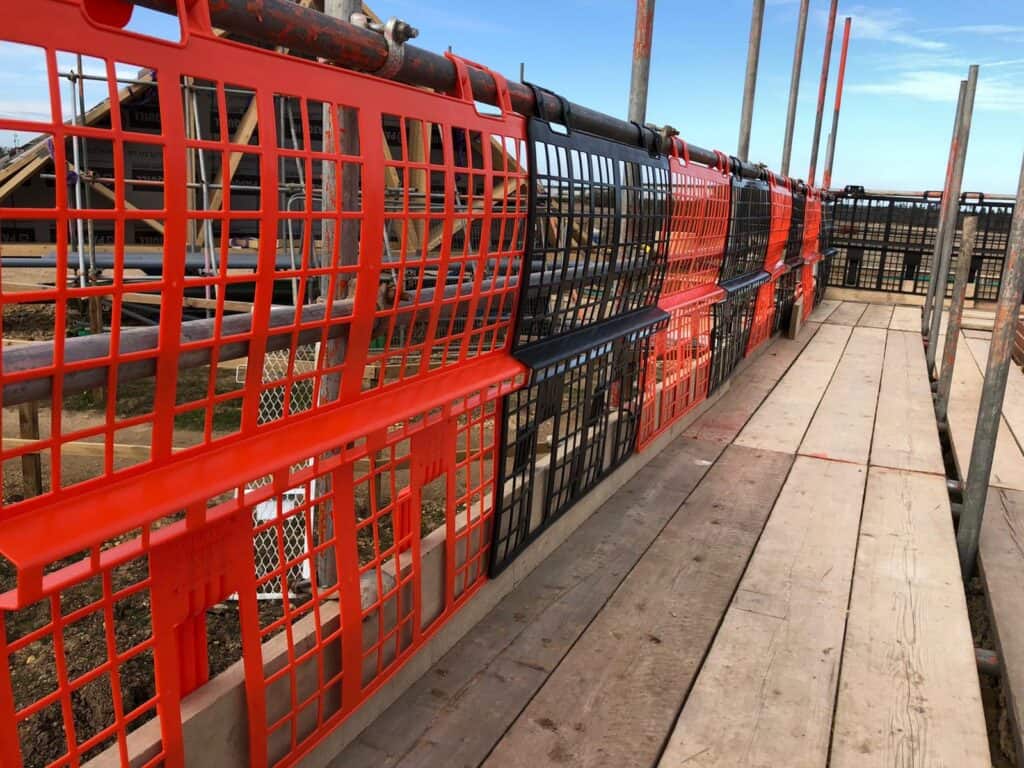
Step 5: Edge Protection & Access
Add guardrails, mid-rails, and toe boards at every working platform.
Use integrated stairs or ladder access towers for safe movement.
Step 6: Final Inspection
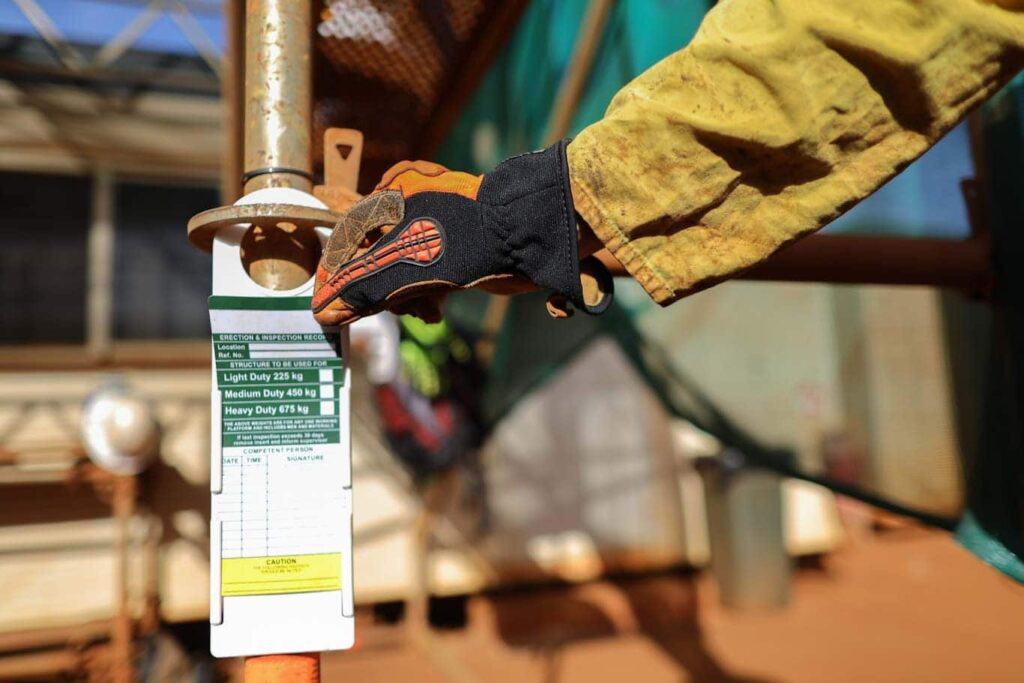
Check all connections, levels, and access systems.
Tag the scaffold with “Safe for Use” signage once inspection is complete.
Safety Checks Before Use
Walk the scaffold to verify:
- All wedges are fully seated.
- Braces are tight and bays are square.
- Tie-in points are secure.
- Deck boards are intact and free of debris.
Complete a hand-over inspection form and “Competent Person” tag.
Efficiency Tips
Team Roles & Sequence
Assign dedicated “setter,” “bracer,” and “deck layer” roles to streamline work.
Pre-Assembly Staging
Pre-slot ledgers and transoms on the ground in bundles by height.
Tool Kits
Issue each crew member a hammer and tag line to minimize tool movement.
Modular Bays
When raising multiple lifts, pre-assemble full bays on the ground for “slip-up” installation.
Quick Checklist Before You Start
Site is clear, level, and hazard-free
All components inspected and compliant
Scaffold design approved by Competent Person
PPE & fall protection available
Team roles assigned
Conclusion
Correctly erecting Ringlock scaffolding boosts both site safety and productivity. By following systematic procedures—starting from proper planning to final inspections—you ensure structural integrity and project efficiency. APAC Scaffold provides high-quality Ringlock systems and technical support tailored to your site needs. Reach out to our team for detailed specs or custom solutions.
FAQs
How much weight can Ringlock scaffolding support?
Standard Ringlock can support up to 24kN per leg, depending on configuration and materials used. Always consult load charts and engineering guidelines.
Do I need a certified engineer to design my scaffold setup?
In most regions, engineered designs are required for heights above a certain threshold (e.g., 4 meters). Check local regulations.
Is Ringlock suitable for curved or irregular structures?
Yes. Ringlock’s 360° rosette allows complex angles and flexible assembly, making it ideal for curved facades or circular tanks.
How often should Ringlock scaffolding be inspected?
Inspect before each shift, after weather events, or any structural adjustment. A thorough weekly inspection is also recommended.